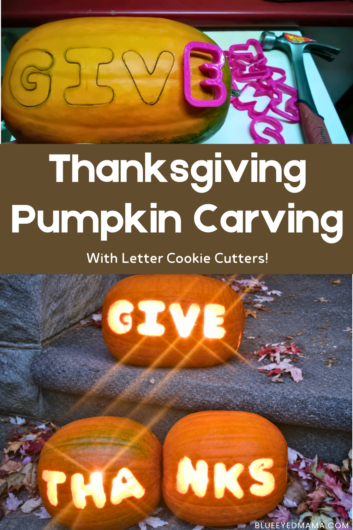
Thanksgiving Pumpkin Carving with Letter Cookie Cutters
Thanksgiving Pumpkin Carving with Letter Cookie Cutters and Our Give Thanks Pumpkin
I love decorating for fall, and while pumpkin carving is usually associated with Halloween, one year we made them for Thanksgiving. After all, pumpkins are already part of so much of our fall decorating, so why not give them a little Thanksgiving makeover?
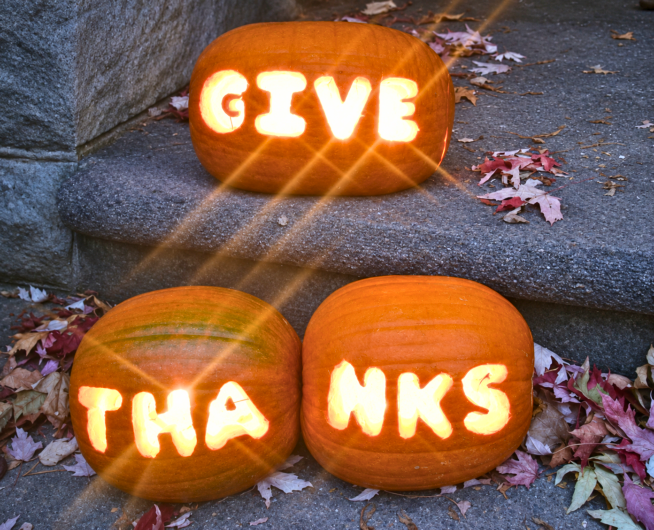
Several years ago, we decided to carve the words “Give Thanks” into some pumpkins using letter-shaped cookie cutters. If I am being honest, we bought them to carve for Halloween, and we just didn’t get to it… so we improvised. The finished pumpkins were such a fun change from the usual jack-o’-lantern.
We chose words, but you could carve a turkey or a pie, there are several things you could do. Carving words is a fairly simple idea, and you can change the message depending on the size of your pumpkins and what you’d like it to say.
What You’ll Need
You won’t need much more than the supplies you would normally use for carving a pumpkin, but you will need a plan. We happened to have picked a few oblong pumpkins, which allowed for better word placement on their sides. So, if you are doing a saying, think about placement and how many pumpkins you might need. We did split up a word, which I think is just fine.
Here’s what you’ll need…
- Some pumpkins
- Alphabet cookie cutters and a hammer (if using a word or phrase)
- Pumpkin carving tools or a small carving saw
- A large spoon or pumpkin scoop
- A washable marker for planning your design
- A towel or newspaper to protect your work surface
- A battery-operated candle or pumpkin light
- Toothpicks (to hold small pieces of pumpkin to the pumpkin)
We chose the words “Give Thanks,” but you could certainly use something else. Just remember that longer messages need more space.
How to Carve a “Give Thanks” Pumpkin Using Cookie Cutter Letters
The cookie cutters are useful for creating the letters, especially if you don’t want to draw each one by hand. The most important part is planning the spacing before you begin carving.
Step 1: Choose Your Pumpkin and Message
Start with a pumpkin that has a fairly smooth side where you can arrange your letters.
Before cutting anything, arrange the cookie cutters across the pumpkin to see how your message will fit. If you’re using two words, you might find that placing one above the other works better.
Step 2: Clean Out the Pumpkin
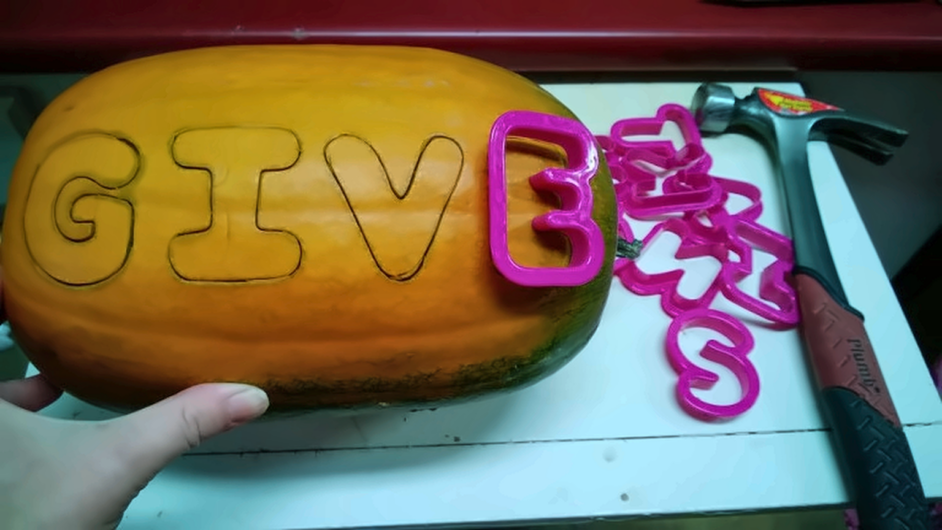
Cut an opening in the pumpkin and scoop out the seeds and stringy insides, just as you would when carving a jack-o’-lantern. For the pumpkin that says “Give”, I carved on the traditional end without thinking. I had to use toothpicks to hold the side in. I would suggest carving the back or bottom if you are laying the pumpkin on its side.
Scrape the inside wall behind the area you’re planning to carve until it’s easier to work with, but don’t make it so thin that the pumpkin becomes weak. This part can be messy, so I like having everything laid out ahead of time.
If the kids are helping, scooping out the pumpkin is a good job for them while an adult handles the sharp tools.
Step 3: Mark Your Letters
Arrange your alphabet cookie cutters on the outside of the pumpkin to spell your message. Take your time with the spacing, making sure to leave enough pumpkin between the letters to keep the design sturdy.
We used a hammer to gently tap the plastic cookie cutters into the pumpkin to create the letter shapes. You’ll want to work carefully and make sure the cutters are sturdy enough for this, since not all cookie cutters are designed to be hammered.
You can also use the cutters to trace the letters with a washable marker and then carve them with a pumpkin saw.
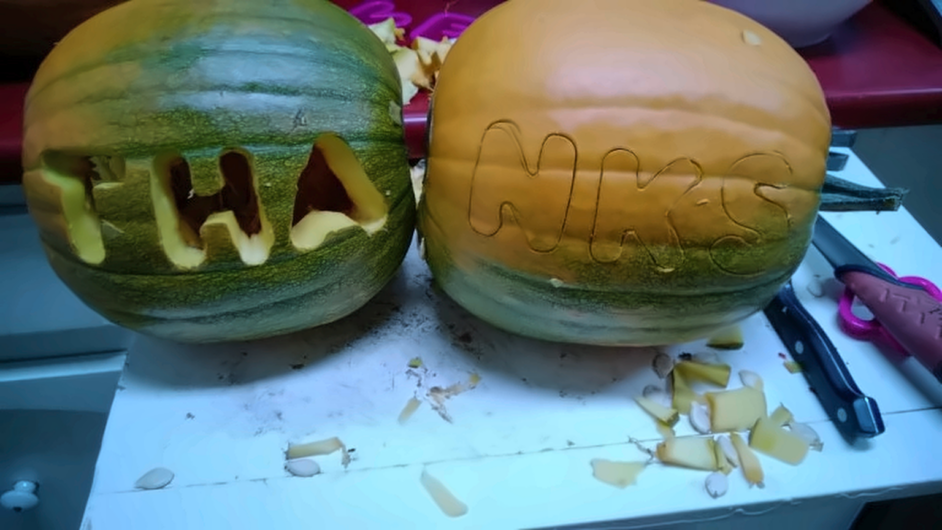
One thing to watch for is the center of letters such as A, B, and R. Those little pieces can be tricky when carving, and you may need to simplify the shapes or use toothpicks to hold pieces in place later. You can see in our picture that the A was having some issues, but a toothpick helped fix it!
Step 4: Carve the Letters
Once you’re happy with the layout, carefully carve along the letter outlines using a pumpkin carving saw or another appropriate carving tool to get them smooth and uniform. Work slowly, especially around the smaller details and curves.
If you’re doing this with younger children, I’d let them help choose the message and arrange the letters, then have an adult handle the actual carving.
Step 5: Add a Light and Display Your Pumpkin
Once the letters are finished, clean away any remaining bits of pumpkin and wipe off visible marker lines. Place a battery-operated light inside, and you’re ready to display your Thanksgiving pumpkin!
I love how a carved message looks when it’s lit up, especially in the evening.
Note the letters A and G are using toothpicks. The G broke off and the A needed support. Use toothpicks to hold what you need, it will still look great.
Other Thanksgiving Messages You Could Carve
“Give Thanks” is a favorite of mine, but there are several other messages that would look cute on a pumpkin.
- Thankful
- Blessed
- Gather
- Grateful
- Family
- Welcome (fun if you are having guests)
You could even carve several smaller pumpkins, each with a different word, and arrange them together. If you’re doing this with older kids, let everyone come up with a message and decide how they want to arrange the letters. That’s part of the fun!
Since doing this, I have envisioned every year getting enough smaller pie pumpkins and putting the message “Happy Thanksgiving”, with a letter in each pumpkin, and setting them along my porch ledge. I haven’t done it yet… but someday!
A Few Supplies That Make Pumpkin Carving Easier
You may already have most of what you need for this project, especially if your family carves pumpkins for Halloween.
- Alphabet cookie cutters: These are the main supplies for creating the letter shapes. A set with larger, simple letters will be easier to work with.
- Pumpkin carving tools: A small carving saw is helpful for following the outlines of the letters.
- Battery-operated pumpkin lights: A convenient way to illuminate the finished message without using an open flame. I love these “candles” but make sure to use them under an awning, they aren’t made for getting wet.
More Thanksgiving Fun for the Family
If you’re looking for more ways to celebrate Thanksgiving together, we’ve enjoyed quite a few simple crafts and activities over the years.
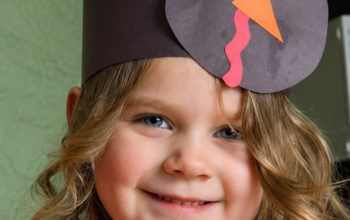
Our Thanksgiving turkey hats were such a fun project that the kids actually remembered them years later and wanted to make them again.
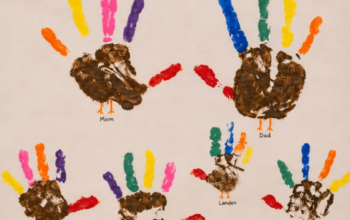
We also made Thanksgiving handprint turkeys, which are some of my favorite keepsakes from when the kids were little.
And if you’re looking for even more ideas, I’ve shared several of our family’s favorite Thanksgiving traditions, including crafts, books, and ways to practice gratitude throughout November.
⭐ Read Our Thanksgiving Family Activities and Traditions
Final Thoughts
I love that I took a missed opportunity and made something fun for Thanksgiving. I also love that people can display sayings of gratefulness.
It’s not a complicated project, kids will need help, but they can be included by helping plan and scooping out the innards.
If you try this Thanksgiving pumpkin carving, or any other using the cookie cutters, I’d love to see what you come up with! Leave a comment below or share your pictures on Instagram or Facebook and tag me @bemandfam.
Happy Thanksgiving!
BEM and Fam 🙂
👇 Save This for Later
Want to come back to this? Pin it so you can find it again when you’re ready!