
Make a Viking Shield
Homeschool Hits Again!
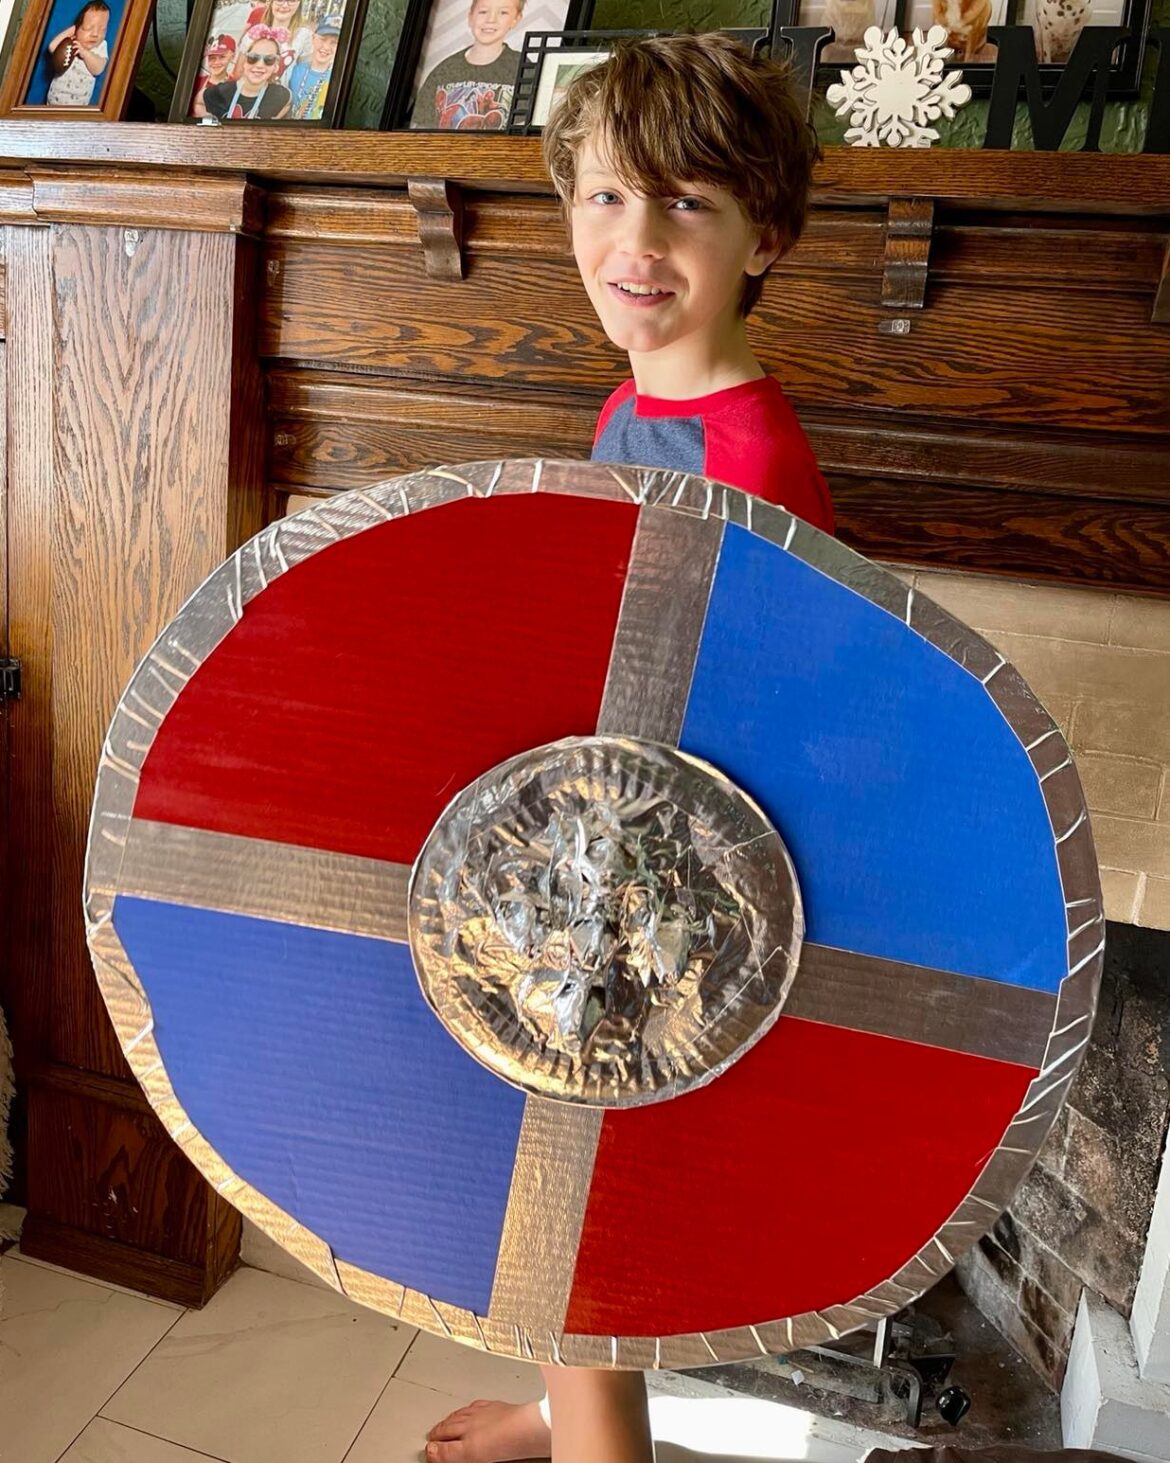
While learning about Vikings we decided to make a Viking Shield! This project was pretty easy, fun, inexpensive, and could just be for a rainy day!
About the Vikings
Vikings are an interesting subject to learn about and there is a lot of misconceptions on what a Viking was. Today, we usually group all people from places like Norway and Iceland, as Vikings, but the truth is, Vikings were the warriors of the Norse… and actually anyone could become a Viking.
The Norse were from the North, they originally came from today’s Norway, finding their way to Iceland and Greenland, and even to places like England and France. They even have ties to Russia! But not all Norsemen were Vikings. Vikings were warriors and there is evidence that people from the Middle East even joined the Vikings!
Vikings do have a bit of a past… they liked to kill and plunder, and they often took other Europeans as slaves. It is interesting how this is overlooked while views on Christopher Columbus have changed so drastically, but that is probably best left to another post.
Another interesting bit is that Vikings didn’t have horns on their helmets, which is sad because they look cool, but they did have shields, and that gets us back to our project…
Let’s Make a Viking Shield
You will need the following…
- cardboard – big enough to cut into a circle but it doesn’t have to be as big as the one we made.
- duck tape – I used chrome duct tape but regular would work
- acrylic paint and paint brushes (water and paper towels for clean-up)
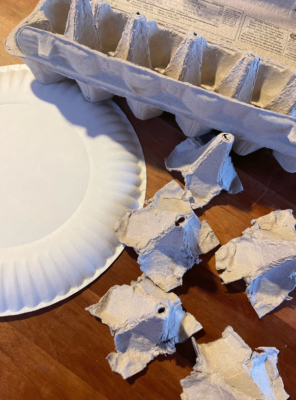
- egg carton
- scissors
- hot glue gun and glue sticks
- paper plate or another cardboard circle much smaller than the first
- plastic milk jug
- a ruler or yardstick and pencil will come in handy too
NOTE: Here is a list purchasable supplies in one spot!
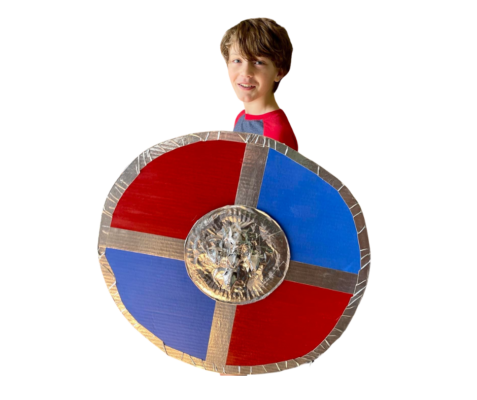
Making this, though several steps, is fun and a great way for kids to express themselves!
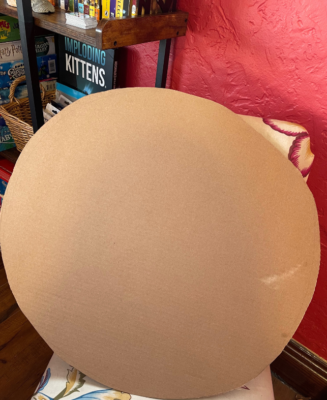
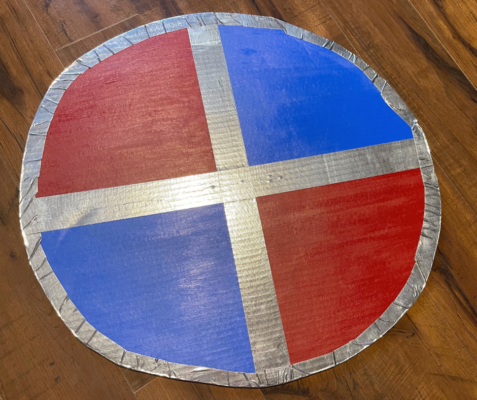
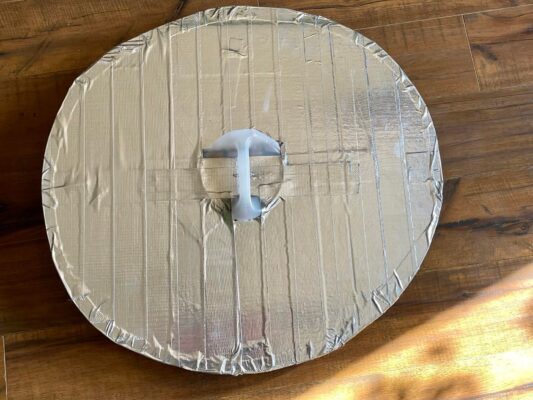
- Cut out a circle from your cardboard
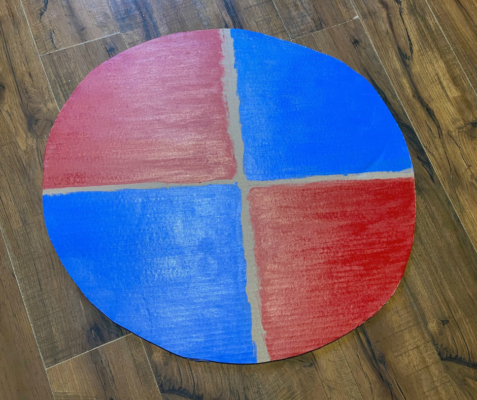
- Paint whatever pattern you would like or your kiddos would like. We looked up some historical pictures and many were brightly colored, some showed wood grain, so my son just chose colors he liked.
- Add the tape in a crisscross fashion and then around the edge. Don’t worry about it being neat or straight, or even flat… this is supposed to look like hand-laid metal from the Viking Era!
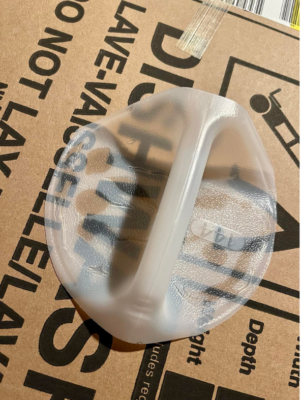
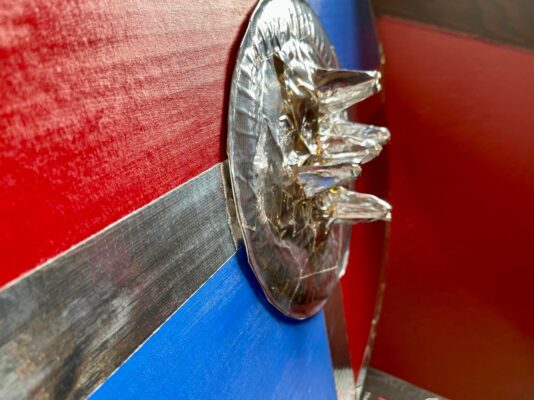
- Now we are going to turn our attention to the centerpiece… and this can be done several ways, but I ripped up the centerpieces of a cardboard/paper egg carton, to get the pointy pieces.
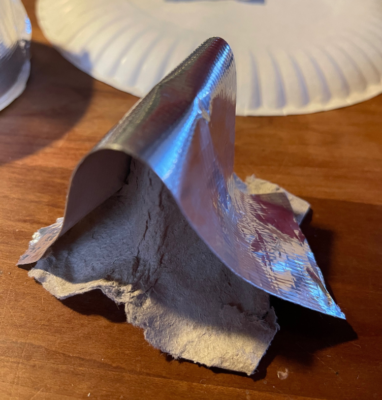
- Next, take each piece and cover it in the tape.
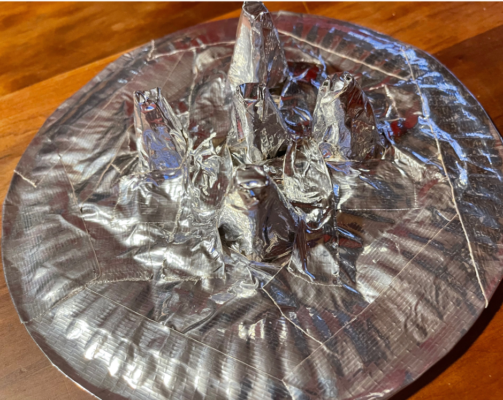
- Repeat for several pointy pieces and then start taping them to a paper plate. Put one in the center and some around it. Again, this doesn’t need to be pretty… it looks super cool when done! I did 1 in center and 4 around but you could add more if you like.
- Set aside the middle piece and turn your attention to the handle. Take a milk jug and cut off the handle. Then, hot glue it to the center of the back of the shield. Allow it to cool. I didn’t get many pictures of this but you can see it below.
- This next step is optional but I think cool and it helps secure the handle a bit more… cut strips of duct tape and tape the entire back, going under the top portion of the handle and then in the opposite direction… as below. Again, this could be skipped but it will help for support, especially if your cardboard is thinner, and it looks really finished when done. NOTE: I didn’t plan on doing this step when I started. Doing this again, I would have waited to use the tape on the edge, going all away around, until I had finished this step.
- Lastly, use a hot glue gun and your center, and front piece, and adhere it to the center of the shield where the X meets.
- And just like that… you are done!
Shields Aren’t Just for Vikings
The kids had fun playing with the shields but as I watched them I realized this would not only make a great project for learning, but it could be used for other period learning, playtime, dress-up, or even Halloween!
They aren’t indestructible but with thicker cardboard and the extra tape, they are quite strong. This is a great way to recycle some old cardboard and milk jugs while being creative!
Learn More about the Norse and Vikings
For anyone wanting to learn more about the Norse and Vikings, and get a printable version of this craft, head over to my Etsy Shop and grab my Leif Erikson printable.
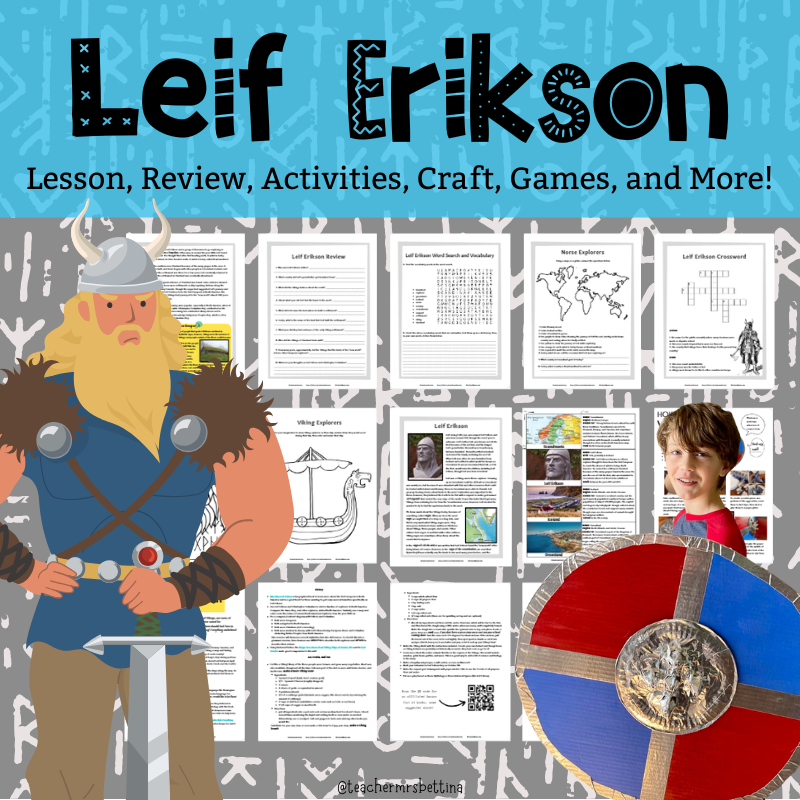
It covers biographical information, has access to an online game, dives deeper into how the Norse lived, and includes activities, worksheets, and several ideas to help dive deeper into the learning process.
Another great tool is to pick up Who Was Leif Erikson. It is an easy way to introduce the history of the Norse and various countries, including Canada!
If you make a Viking shield please share it with me! You can comment below or head over to Instagram or Facebook and share your pics… tag me @bemandfam! I am excited to see how different these shields can be!
Don’t forget to pin this for later and if you like Pinterest, I am there too!
Enjoy your play time,
BEM and Fam 🙂 [DISPLAY_ULTIMATE_SOCIAL_ICONS]

PS. This post has some affiliate links, read more about those here.