Arctic Snow Dough
Fun Way for Arctic Play!
While exploring the arctic with the kids, for our Canada unit, we decided to make some arctic snow dough. Snow dough is all over Pinterest, as are other types of doughs and slimes, so we found a basic recipe and decided to add glitter to ours. Glitter is not necessary but does add a little something to it!
Making the Dough
 What You’ll Need
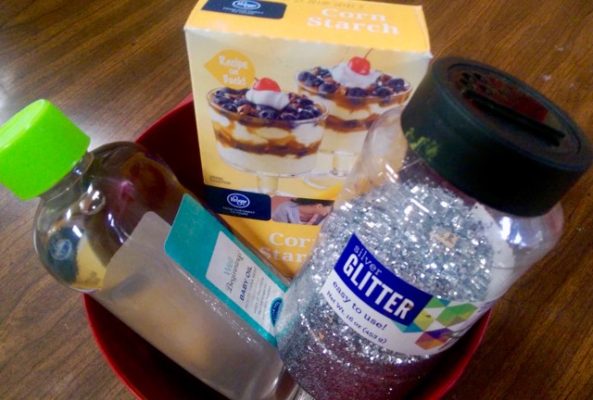
Making this is quite simple and you’ll only need…
- cornstarch or corn flour (UK)
- baby oil
- white glitter
The baby oil will help this smell amazing, however, if you think your little one will put this in their mouth, use vegetable oil, baby oil should not be ingested. I would also omit the glitter if your child is small, unless you use edible glitter. Cornstarch and vegetable oil is completely safe to consume, should some get in your little one’s mouth, but glitter and baby oil, not so much!
Making Your Snow Dough
- Measure 2 cups cornstarch, 1/3-1/2 cups oil, and 3-4 Tbsp of glitter
- Mix together
- Play
Notes:
- Start with the 3rd cup oil and if you don’t like the feel, add some more.
- If you want more glitter, go for it!
- You could also double this to make more and separate adding some coloring to a portion to make blue snow dough for water. This could be used in diorama
- I used silver glitter and that is why I put white. The silver was nice but it added a gray element. White or opaque glitter would probably work best for snow
- Since we first made this snow dough, which was years before I posted it… I am not the best blogger, I have begun to only use organic cornstarch for eating. While this isn’t edible, I’d probably still aim for at least a non-GMO variety. Not because it is important for the dough, but I am trying to be intentional with what I buy. I don’t want to support brands that support bioengineered foods. I hope that makes sense. This is why I linked different brands than I have pictured. I plan to make this again and redo the pictures!
- I thought about linking edible glitter but I don’t know enough about it to even suggest anything. If you do, comment below and tell me about it!
- To store it, just put it in an airtight container, I used a piece of Pyrex with a lid, but almost anything would do… even a ziplock.
Time to Play
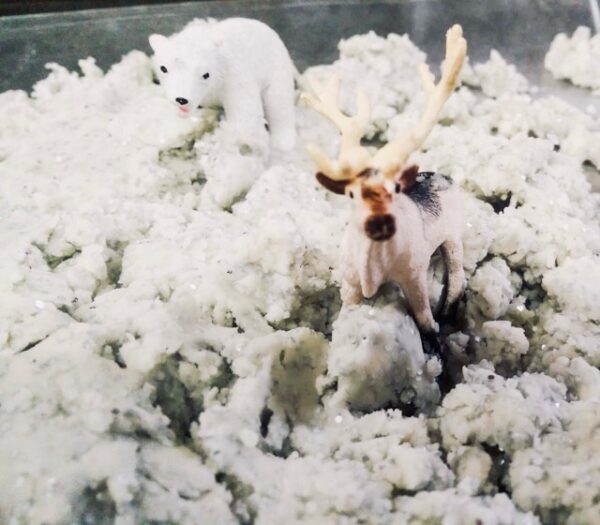
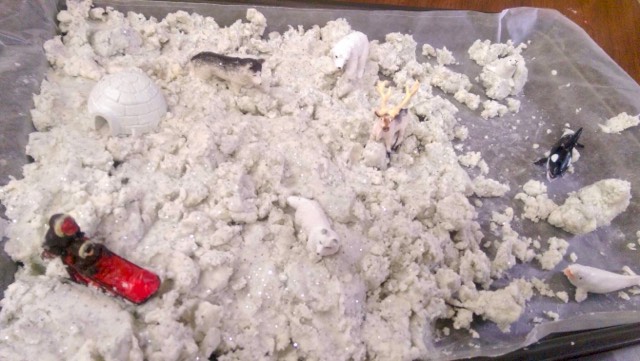 I laid out a cookie sheet, put on a piece of wax paper, and poured the dough onto that, however, a plastic bin or almost anything would work for the playtime.
To finish off the arctic play I made sure I had some arctic figures on hand. As we were studying Canada, I made sure to only include figures from the Northern region, however, you could include penguins (Antarctic region) and much more.
Here is a link to some Arctic Animal books! There are so many cute ones to choose from, but having one or two on hand could really connect playtime to learning!
While I used this for a learning tool, this snow dough would be fun for a blah winter day or for those that live in regions where winter doesn’t bring any snow.
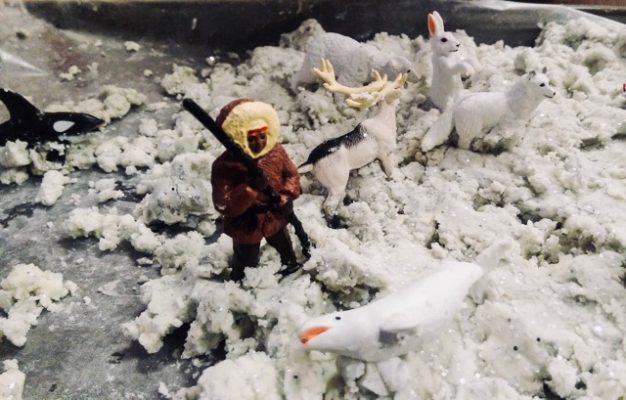 This stuff is fun! I love playing with it, my kids do too, and even my oldest still loves to get it out once in a while… sometimes even with a book that goes along with an animal he is playing with.
If you are learning about the Arctic and/or the Antarctic check out my Fluffy Snow Slime Post and my Blubber Post… both have a lot of potential in fun and education!
Comment below to let me know what you thought of the snow dough and how your kiddos enjoyed it… and don’t forget to stop by Facebook and Instagram and join our community!
Don’t forget to pin this for later and if you like Pinterest, I am there too!
BEM + Fam 🙂 ![]()
![]()
![]()
![]()
![]()
![]()
![]()
![]()
![]()
![]()
![]()
![]()

PS. This post has some affiliate links, read more about those here.