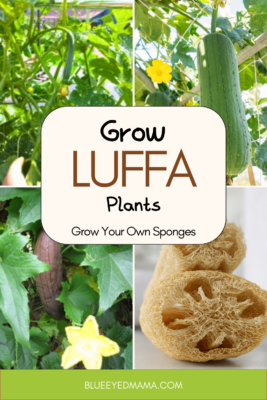
How to Grow a Luffa Sponge
Grow a Gourd and Get a Sponge!
I have been on a quest to use less plastic and avoid disposable items. This is a hard task in today’s world, so much is made with plastic packaging or is made to be disposable, but I have made changes. One of those changes has been to grow my own sponges. First, I had to learn how to grow a luffa!
Growing a Luffa Sponge
A couple of years ago, when setting up the garden, I decided to give this a try. I had grown several things quite well in my garden boxes but never any gourds. I learned that Luffa aegyptiaca, the scientific name of the Luffa Sponge plant, was a fairly easy gourd to grow and ordered some seeds!
While I waited for my seeds, I did some digging and found that the Luffa gourd is a native of the Asian tropics and is commonly just called luffa, but is also known as Chinese loofah, vegetable sponge, and dishcloth gourd. I also learned that this plant is edible. If the fruit is picked early (at only a couple of inches), they are great in salads and if left until cucumber size they are used like cucumber or zucchini. Some cultures even sauté the flowers, however, do not attempt to eat the bigger fruit, as they are too fibrous and are very bitter once bigger.
About the Luffa Plant
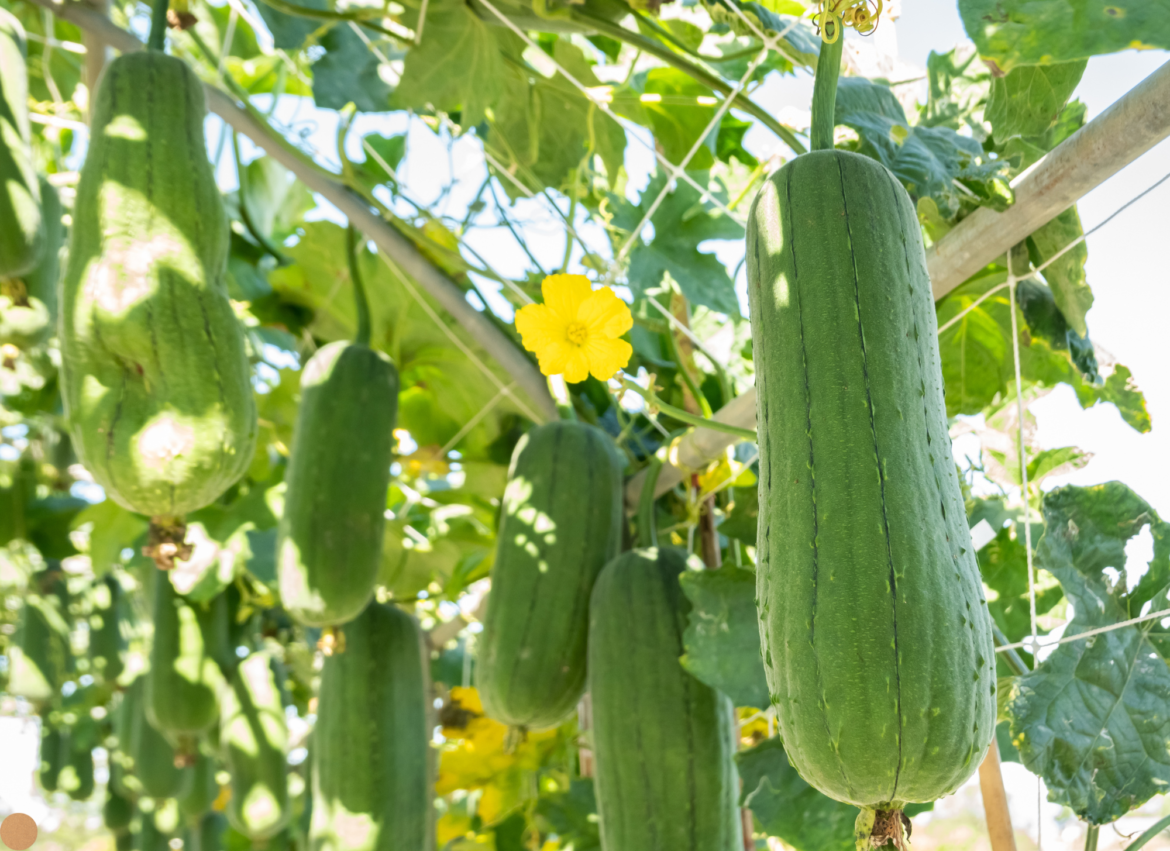
The Luffa is an annual plant that requires at least 6 hours of full sun. The soil needs adequate drainage and can be grown in most soil types (soil pH of Acid <6.0). The plant is a rapid grower and will probably require a trellis as it likes to climb. Each plant can grow between 10-30 gourds and the flowers attract bees to the garden, which is good!
Planting your Luffa Plant
I got my seeds and planted them in my garden box during the second week of May (I live in Zone 5). You could get these earlier and start them indoors if you wanted, but I haven’t perfected this and usually just plant seeds in the garden box or buy plants.
I use the square-foot garden idea as the foundation of my gardening. In doing this, each plant gets a certain space inside the garden box versus several rows of plants. This method has allowed me to grow hundreds of plants on a normal-sized town lot both attractively and easily. Each of the luffa plants takes 2 square feet of space in the garden box and as I grow my vines on a vertical trellis, the fruit hangs instead of sitting on the ground.
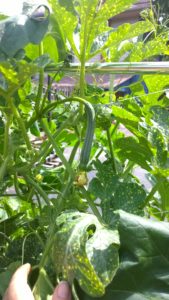
These took off…seriously! The flowers were pretty and the gourds got up to 2 feet. Once they were growing, they needed little from me other than what I would give my regular garden plants.
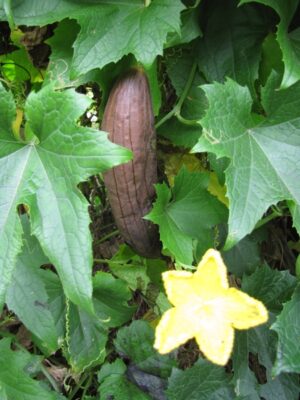
I allowed my gourds to sit on my vine until somewhere between Halloween and Thanksgiving. They went from a green to a very dark, almost black color. They also went from being very heavy to almost light as a feather… that is how you know they are ready!
When they were ready, I cut them and allowed them to dry out on my covered front porch. I honestly forgot about them and they sat out there all winter into spring. I wasn’t sure they would work but once I started working with them, I realized they were fine. You have got to love projects that aren’t too demanding!
Getting To Your Luffa
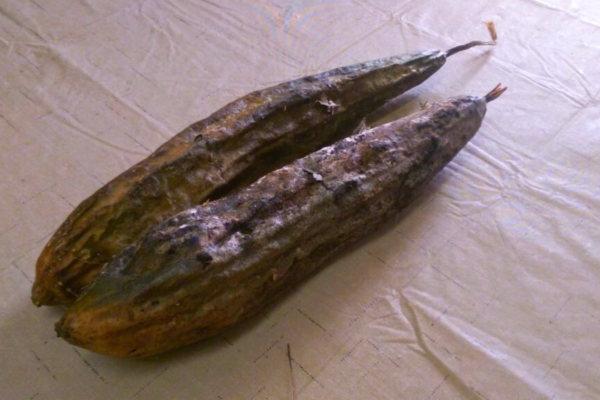
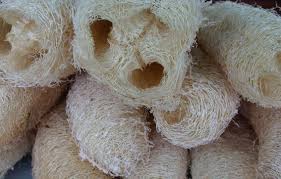
After forgetting about the gourds I was surprised they were ok but honestly, they weren’t pretty. Below is a picture of the dried gourds.
To get the luffa out the first thing you do is bang them around a bit, what you are doing is loosening the seeds. Transfer to the sink, allow them to soak for about 20 minutes, and then start breaking off the skin.
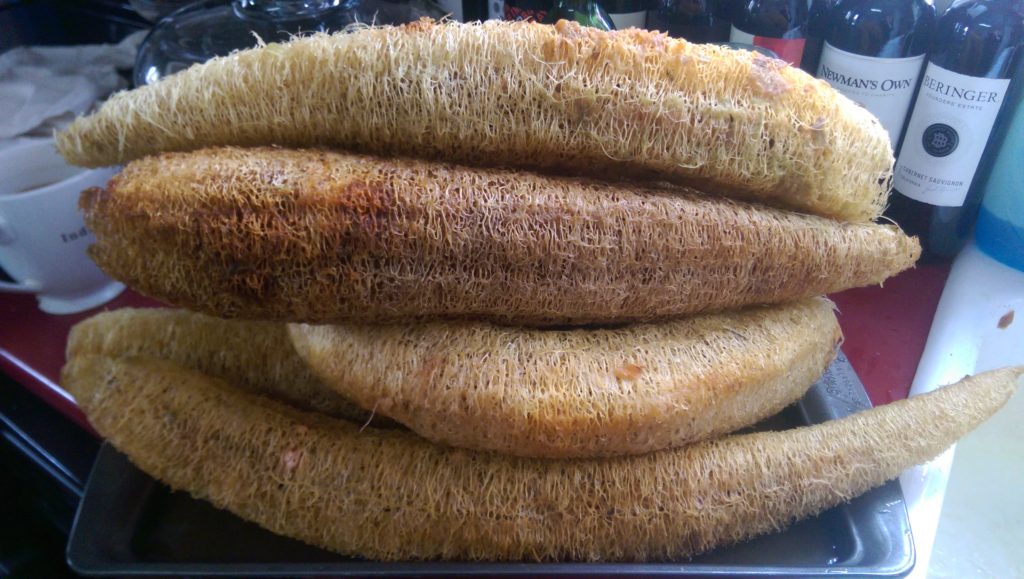
The above are the luffas without the skin but BEFORE being washed. Once the skin is off you will want to soak the sponges and wash them thoroughly to ensure no flesh fibers are left.
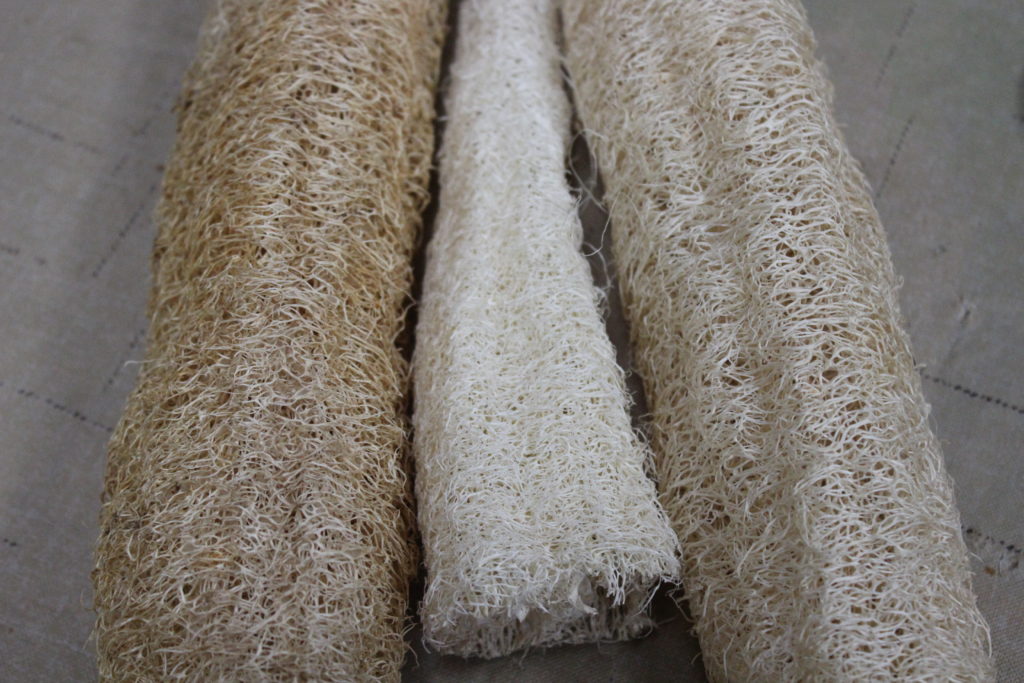
After washing, check again for leftover seeds and once they are “clean” soak in a bleach solution for a bit. What this does is not only sterilize but it also removes 99% of the stains.
I don’t use bleach often and I know many won’t want to do this step, but if you want to use these to clean with or even to make some cool soaps with… you should do this. You can see here the difference between a bleached and unbleached luffa.
After the bleaching, allow each luffa to dry fully… and that is it.
You can cut them to the size you need and I usually cut them into a 2-3 inch piece to use in my kitchen or bathroom… or even to bathe with. You don’t have to cut them at once, you can store them intact and cut them when needed.
You might be asking… “Do these work to clean with?” and the answer is YES! I use these all the time like I would a normal sponge and they dry so much better. They don’t get gross or smell, assuming you rinse them when done and set them flat to dry. I use them on dishes, to clean the sink, and I even use them in the shower to clean. They are great!
Growing Green
By growing a few plants, you can have sponges for a year or longer and these make great gifts. I have seen very cute, artisan soaps made with these, so if you are into soap making… these might be for you!
These also eliminate synthetic sponges and of course, sea sponges, if anyone uses them anymore. Growing luffas is a fun and practical first step to helping the environment. If every family worldwide eliminated synthetic sponges… that would make a big difference! This is something you can feel good about!
Last Notes…
- I haven’t ever seen these seeds in regular stores but they are prevalent online. So, if you want to grow a luffa, check this link for seeds.
- For those of you new to gardening, check out this book, Square Foot Gardening. This book really helped me go from knowing nothing to knowing quite a bit. I don’t follow everything in the book but it is a great place to start.
- If you don’t have much space or live in a very urban area, try these garden bags. I use them all the time for extra growing and have grown corn, tomatoes, and potatoes in them… gourds would work too but you will want a trellis or extra large tomato cage.
Happy Gardening!
I hope you have fun growing your own luffa! This would make a great summer project for the family. Growing a garden together can be a fun and educational thing to do during the summer. I always suggest it to people looking for things to do with their kids during the summer. Check out my 25 FREE Things to do in the Summer post for more ideas, including gardening!
If you have questions or grow these, I’d love to hear from you! You can comment below or head over to Instagram or Facebook and share your pics… tag me @bemandfam!
Don’t forget to pin this for later and if you like Pinterest, I am there too!
BEM and Fam 🙂 [DISPLAY_ULTIMATE_SOCIAL_ICONS]
PS. This post has some affiliate links, read more about those here.