DIY Halloween Treat Bags (Felt + Canvas Craft)
Easy Halloween Treat Bags
Simple, cozy, and kid-approved… even my then-13-year-old son loved this one. Updated in 2025 to update links and FREE Printable! Also, check the 2025 update section! 🎃
There are times holidays just sneak up on me. This year, I noticed a few days before Halloween, that I hadn’t really done much with the kids, well Halloween wise. Life gets busy and it seems harder and harder to fit in things. It popped into my mind to make some Halloween treat bags.
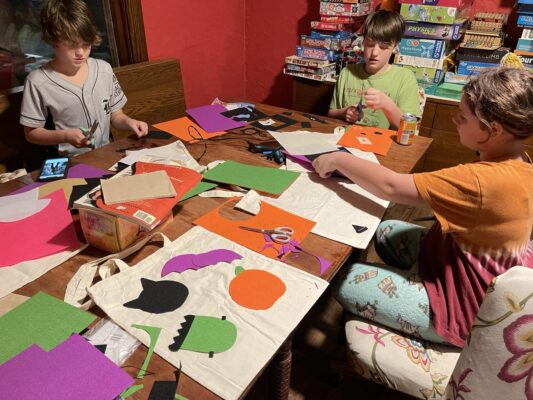
I grabbed some plain canvas tote bags, a handful of felt, and glue sticks. We spread everything out on the table and made our own Halloween treat bags, and honestly, it turned into one of my favorite memories. There’s something special about making your own trick-or-treat bag. Like a Christmas stocking, it becomes yours… a little tradition you pull out every year.
What You’ll Need
- cotton canvas bags
- Halloween colored felt (though my kids used other colors too)
- felt glue
- scissors
- cardboard
- pencil
- sharpie
- stencil (optional free download that I created)
- needle and embroidery thread (optional)
Notes: You could use other things like buttons, glitter pens, markers, paint, and really… the sky is the limit.
Making Your Creations
-
Put the cardboard inside your tote. This helps so there is no marker bleeding or gluing through bag.
-
Sketch your shapes on felt or print my free stencil if you prefer.
-
Cut, arrange, and glue the pieces on.
-
Once the glue dries, add a few quick stitches if you want it to last for years.
-
Decorate both sides if you’re feeling ambitious, or just one if you’re short on time.
Tip: I like to glue everything first so it doesn’t shift while sewing later.
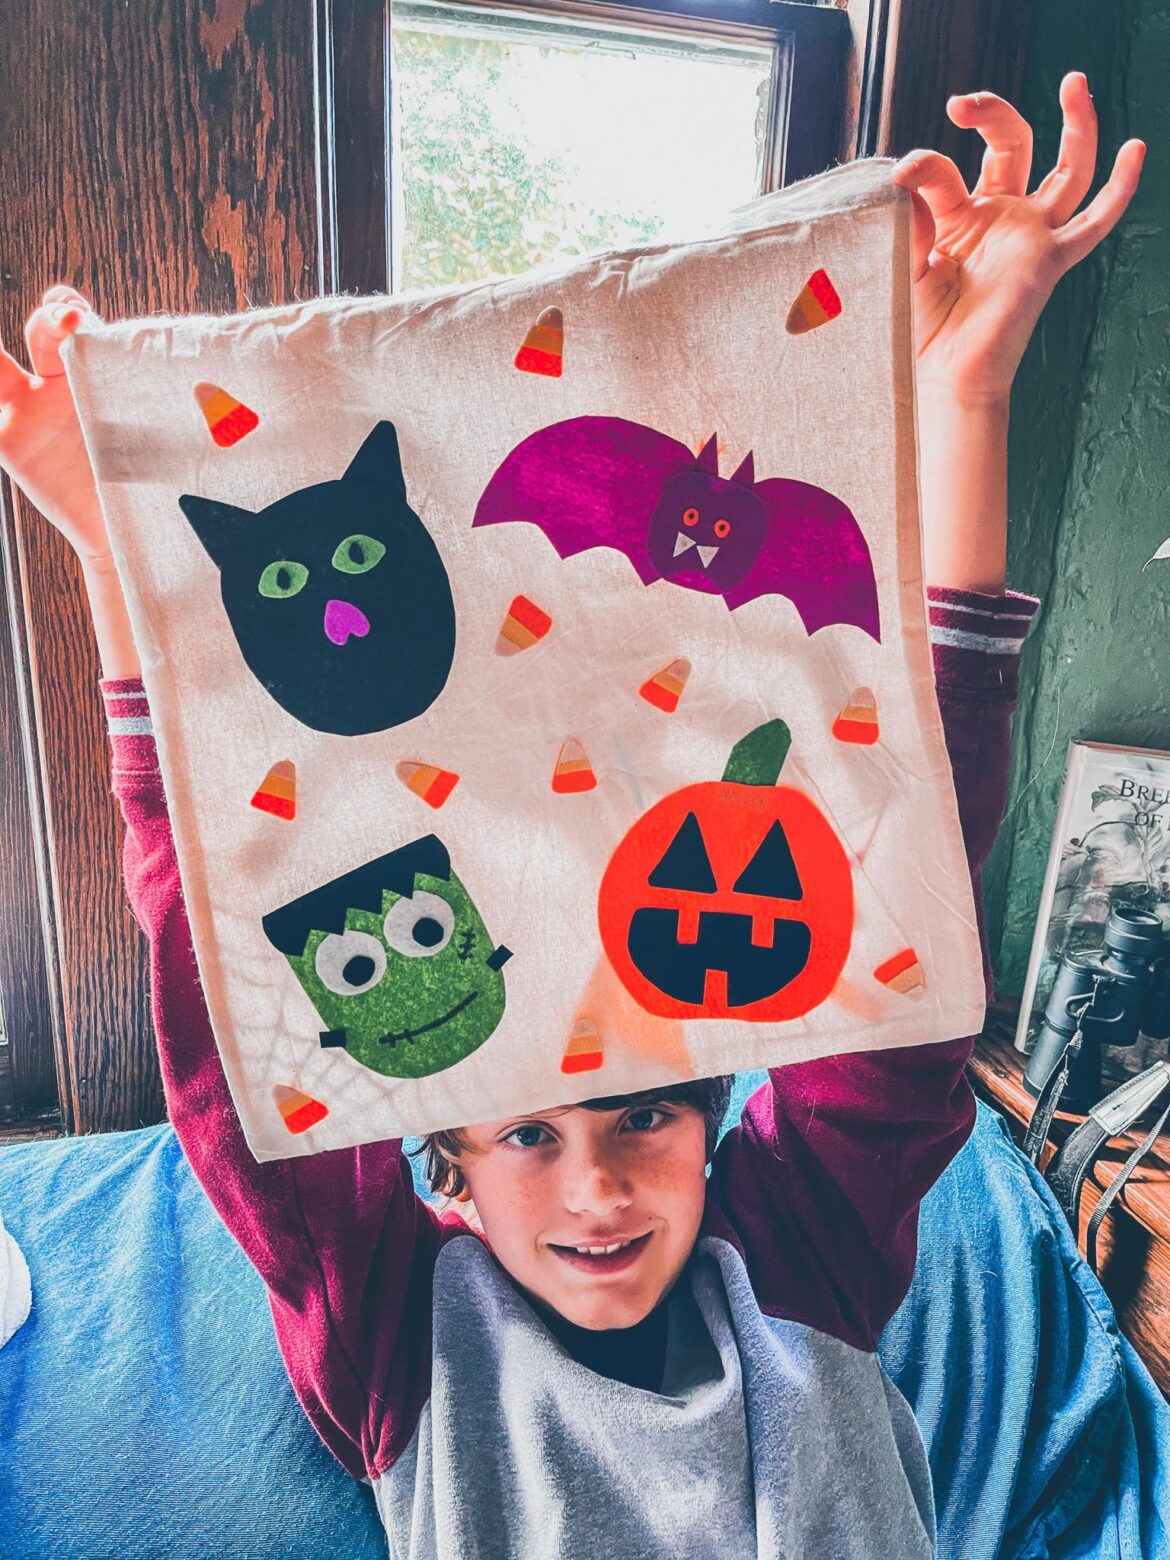
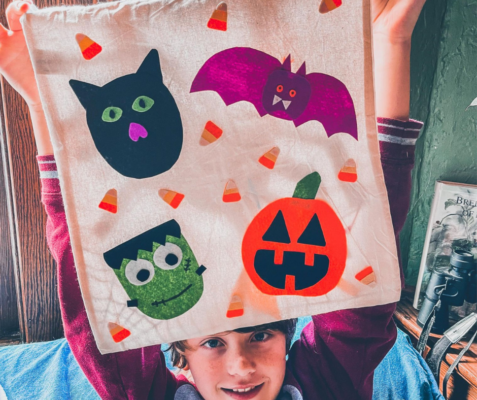
This is really where you and your kiddos can get creative. I did a bag too, along with my kiddos. They used theirs for Halloween and I just did one for fun, but I love how they turned out! The bags are of course 2 sided, I made a spider on one side and on the other side, I did some traditional Halloween figures with some candy corn accents (which is pictured above).
Below are quick and general instructions and a section showing how I specifically made my bag.
Basic Instructions
- Decide what you would like on your bag and lightly draw it on the felt with a pencil (or use my stencils). Then, either cut the line off or turn over the felt.
- Choose if you would like to glue or sew the felt items on your bag… or both. When gluing, we put a big piece of cardboard inside the bag to ensure we didn’t glue the bag closed. At first, I didn’t think I wanted to sew everything, however, later I decided to do a quick stitch to ensure the longevity.
Specific Instructions
🦇 Front- Monsters and Candy Corn side
Items Needed:
- To make the bat, cat, pumpkin, and Frankenstein’s monster you will need green, purple, orange, black, and white felt
- To make the candy corn you will also need yellow felt
- Felt glue or embroidery thread and needle (or both)
- Canvas Bag
Instructions:
- Cat – Cut the cat head of the cat, attach it to the bag.
- cut and layer on the green eyes and nose
- cut and layer on the black in the eyes
- Bat – Cut the bat body (my stencil is not the same, I freehanded mine, the stencil is for a guide) and attach to the bag
- cut the head of the bat and layer it on the body
- cut the ears, eyes, and teeth, and then layer it on. For the black of the eyes, I dabbed on some permanent marker but you could use a stitch to do that too
- Frankenstein’s monster – Cut Frankenstein’s monster’s green head and attach to the bag
- cut the hair and white of eyes and layer on to the head
- cut the black of the eyes and the neck knobs and layer them on
- draw or stitch on the mouth and scars
- Pumpkin – Cut a pumpkin shape (circle or other) and attach to the bag
- cut and layer the stem and eyes and mouth, and attach to the bag
- Adding Candy Corn – follow the below steps
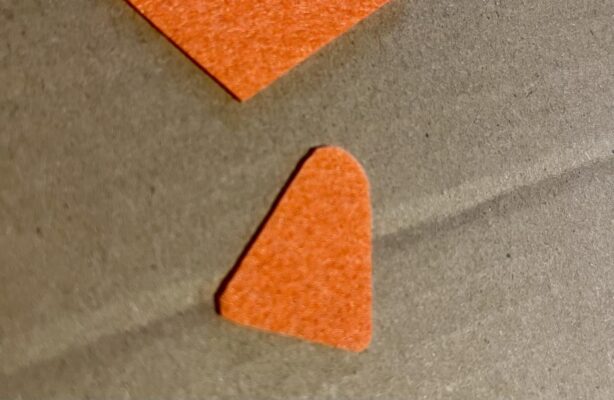
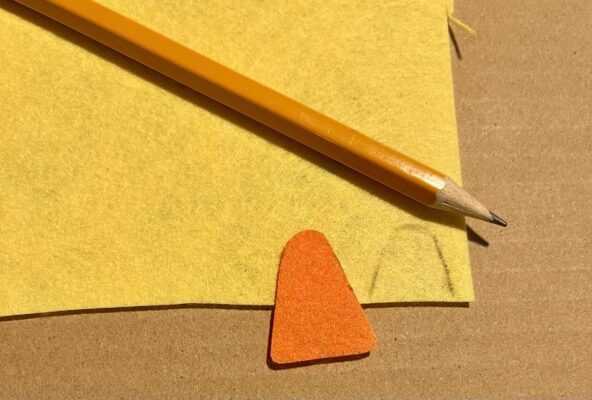
- Cut an orange, rounded cone shape in size you would like
- Trace the top 2/3 of shape onto the yellow and cut it out
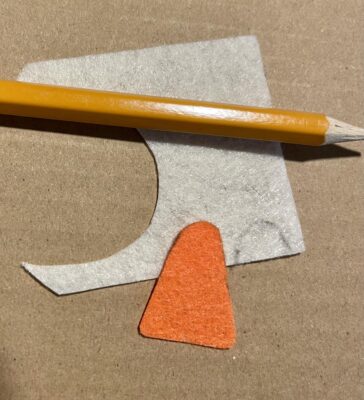
- Follow the same step for white felt, but do the top third only
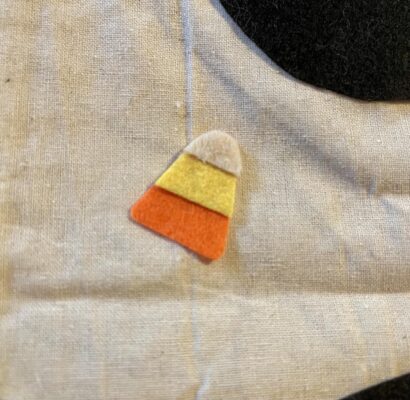
- Glue them on the bag in layers
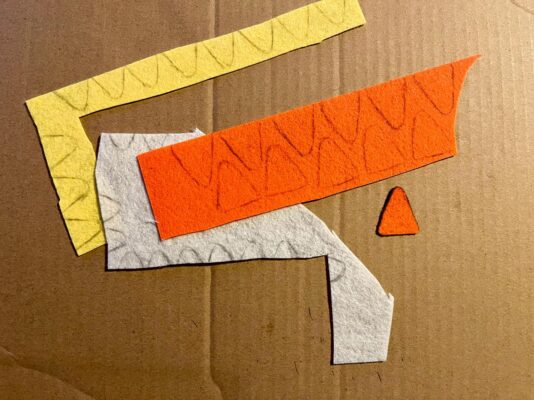
- Repeat as many times as you would like

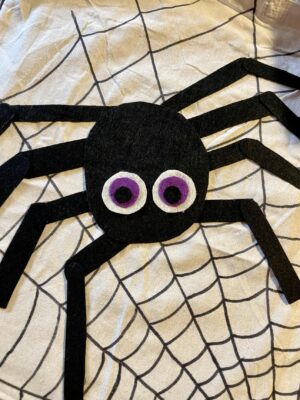
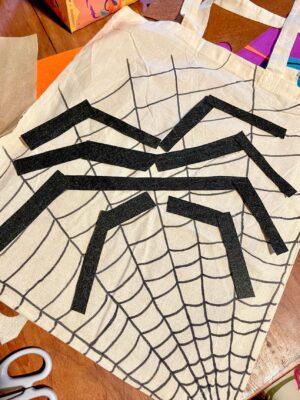
🕷Spider side
Items Needed
- Black and white felt, and another eye color. I used purple, light green would be good too!
- Permanent marker
- Felt glue or embroidery thread and needle (or both)
- Canvas Bag
Instructions:
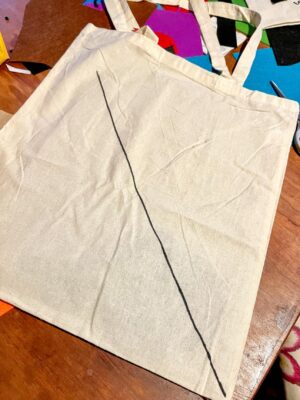
- Begin use a piece of cardboard to make sure the pen does not bleed. Put it inside the bag
- Draw a diagonal line from bottom corner, across the bag
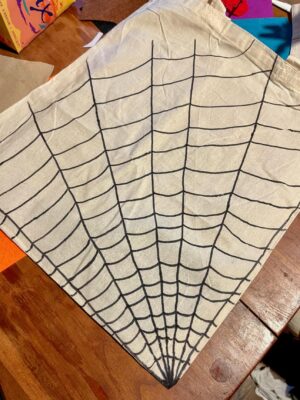
- Draw several more diagonal lines across the bag
- Add scalloped, curved lines connecting the diagonal lines

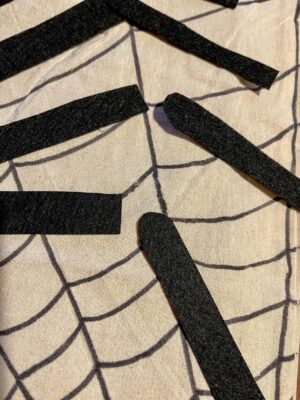
- Cut 16 pieces to make 8 legs. The length can be your choice
- Round parts of the legs as you see fit
- Attach the legs to bag how you would like the spider to sit
- Cut a circle for the body and attach to the bag
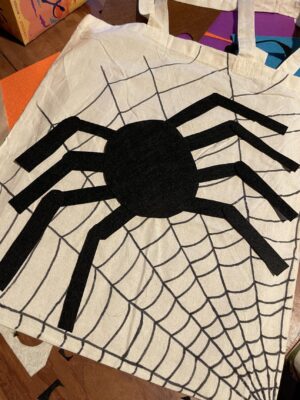
- Cut eyes out, I used white, purple, and black

- Layer the eyes onto the body
Notes:
- You don’t have to do two sides and you especially don’t have to do two different styles. I wanted both and only had one extra bag.
- I freehanded the spider, like I did the others, but I added a spider to the stencils too! Grab it here
- Yes, I went back in and stitched everything, all the candy corn, the legs, the eyes… below is some of that for you to see. I love the look but it took a minute.
- This project took a week before the sewing, so keep that in mind if you are close to Halloween, but that is because I did so many Candy Corns… my kids’ bags took a couple hours.
- My kids also sewed theirs, this project helped them learn how to do a simple stitch
Finished Projects
This picture cracks me up a bit because my youngest, who has never seen Friday the 13th, decided to not only make his bag with Jason on it, but he also painted his pumpkin that way.
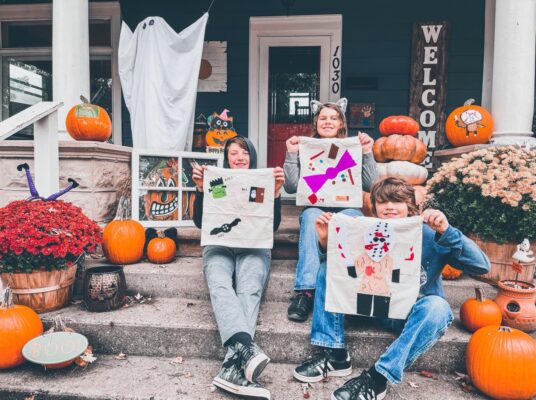
You can see the Friday the 13th pumpkin behind the kids, on the right. The Jasons are so comical and cute, it is just hard not to laugh. Anyway, my daughter made candies all over her bag and my other son did some familiar Halloween figures.
We had a great time and honestly, these would make great gifts too!
Want to keep the Halloween fun going? 🎃
✅ Download the Treat Bag Stencil → here
✅ Grab the “You’ve Been Booed” printable → an easy kindness activity for the neighborhood → here
✅ Shop our craft supply list → here
✅ Save this post → here
✅ Explore more ideas → check out our full Halloween Hub for crafts and cozy family fun → here
If you make these, I would love to hear about them! Comment below or head over to Instagram or Facebook, share your pics, and tag me @bemandfam… I’d love to see them!
BEM + Fam 🙂
👉 Save This For Later


🛒PS. This post has some affiliate links, read more about those here.
2025 Update – These Bags Are Still Our Favorites 🎃
Four years ago we made these Halloween treat bags just for fun, but they’ve stuck around in the best way.
We pulled them out again this year, and even my now-17-year-old used his same bag. (That’s saying something!) The stitches have held up beautifully, and they’re officially part of our family Halloween tradition now.
Here you can see the sewing I did on mine.

What started as a quick craft turned into something we still look forward to each October. The kids tease about whose design has “aged best,” and this year I am thinking about making Easter bags… even though the kids are getting “too old”! This past Easter, my youngest (15) told me I needed to make him a basket “forever, no matter how old he or I get”. So, might as well make one!
They only get better with age. Here’s my son (15) this year at our State Park’s trick-or-treating event. Jason is still hanging on!

Anyway, If you make your own, don’t be afraid to personalize them more over time, add names, extra stitches, or even a few new felt shapes each Halloween. Every thing tells a story!
Happy Halloween!
BEM 🙂