
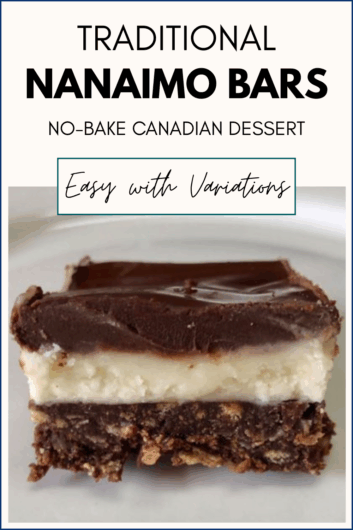
Classic Nanaimo Bars (A No-Bake Canadian Dessert)
A Tasty Canadian Classic Recipe
During our Canadian studies for school, we came across a list of traditional Canadian foods. One of them was something I’d never heard of before… Nanaimo Bars.
There were others, of course, with poutine being the obvious one, but Nanaimo Bars caught my attention right away. A no-bake dessert with layers? That felt approachable and interesting.
Nanaimo Bars are named after Nanaimo, British Columbia (pronounced nuh-n-eye-mo), a city on Vancouver Island. From what I read, there is a little controversy about where these bars come from, with some saying these bars were once called London Fog bars, implying that they are from London, but to Canadians, especially on the west coast, these are a staple dessert!
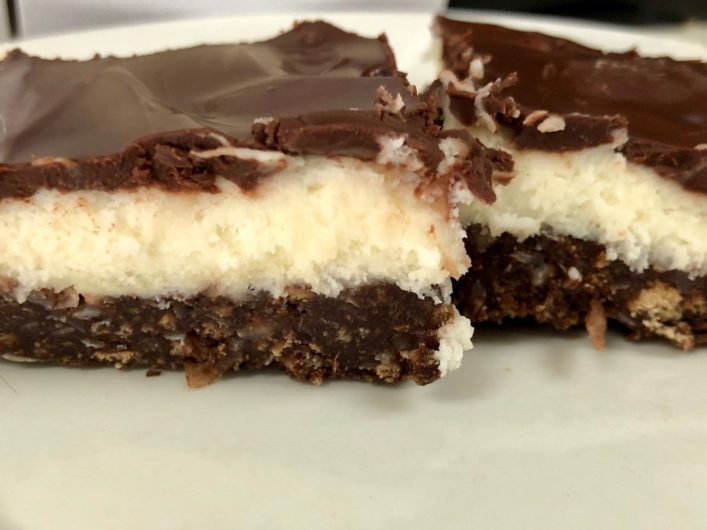
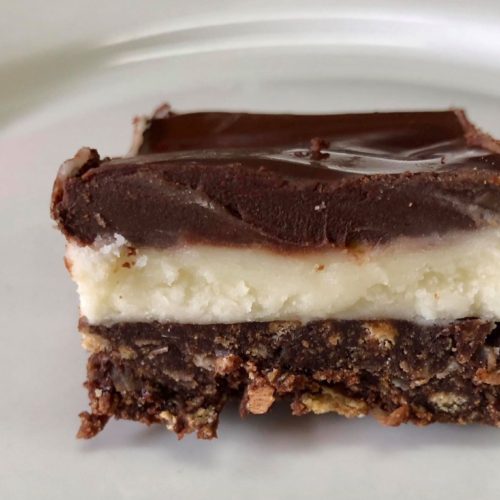
This classic dessert has three layers…
- a coconut crumb base
- a buttery vanilla icing middle
- a smooth chocolate topping
What makes them especially fun is how flexible they are. The base stays mostly the same, but the middle layer can be flavored in different ways, mint, peanut butter, mocha, fruit, and more. Once you understand the structure, it opens the door to lots of variations without needing entirely new recipes.
This post shares the classic version we started with, the one that made us fall in love with Nanaimo Bars in the first place.
What You’ll Need
Ingredients
- Butter
- Sugar
- Cocoa powder
- Graham crackers
- Egg
- Shredded coconut
- Heavy cream
- Vanilla
- Powdered sugar
- Baking chocolate
Supplies
- 8×8 pan
- Mixing bowls
- Spatula
How to Make Nanaimo Bars
Layer 1: Coconut Crumb Base
- Melt some of the butter, then mix in cocoa powder, sugar, graham cracker crumbs, shredded coconut, and the tempered egg.
- Press the mixture firmly into an 8×8 pan and place it in the refrigerator to chill.
- During this step, you could line the pan with parchment paper to help remove later, however, it is not necessary.
Layer 2: Vanilla Butter Icing
- Cream another portion of butter with heavy cream, cornstarch, and vanilla.
- Gradually mix in powdered sugar until smooth and spreadable.
- Layer this over the chilled base and return the pan to the fridge.
Layer 3: Chocolate Topping
- Melt the remaining butter and baking chocolate together until smooth.
- Pour evenly over the second layer and refrigerate until fully set before slicing.
Helpful Notes & Variations
- Use real butter, not margarine, the texture matters here.
- If you’re outside the U.S. or can’t find graham crackers, digestive biscuits work well as a substitute.
- Chilling between layers makes a big difference, especially for clean slices.
- Custard powder is traditionally used, but not always available in the U.S. and cornstarch is a traditional substitute. I personally use organic cornstarch, and for those that aren’t sure about cornstarch, while it can spike blood sugar, it is fine to use in a dessert that already will spike sugar.
- These bars are rich, we usually cut them into small squares. An 8×8 pan can make 16, 32, or even 64 bite-size pieces.
- For gatherings or bake sales, small squares are perfect. Just be sure to label for dairy and coconut.
Flavor Variations (Coming Soon)
Once you understand the base recipe, it’s easy to experiment:
- Mint (a favorite around her for both Christmas and St. Patrick’s Day)
- Strawberry (made with white chocolate and so pretty!)
- Peanut butter
- Mocha
Each version starts from the same foundation, just small changes that completely shift the final flavor.
A Little Canadian Context
If you’re a fan of Schitt’s Creek, you might remember the scene where Jocelyn brings Nanaimo Bars to the Rose family. When we saw that, we immediately thought, “We know what those are!”
Canada Day (July 1st) is a great excuse to make these and learn a bit more about Canada at the same time.
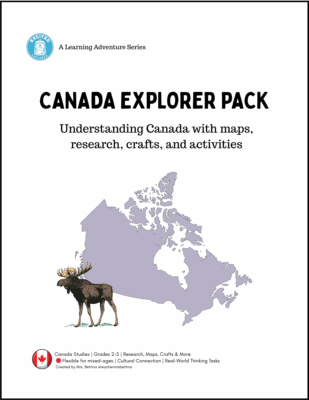
If you’re exploring Canada with your kids, I also have a Canada learning pack that pairs nicely with hands-on activities like this. It is simple, flexible, and designed for homeschool or family learning.
Enjoy This Bit of Canada
We loved making these together, and they’ve become one of those recipes that you can reuse again and again. In the United States, they are different enough to make a hit at a party or dinner.
If you try Nanaimo Bars (or experiment with a flavor of your own), I’d love to hear about it. You can comment below or share pics on Instagram or Facebook and tag @bemandfam.
And if you’re building a recipe box slowly, the kind where one base leads to many ideas… this one is a good place to start!
BEM and Fam 🙂
👉 Save This for Later
PS. This post has some affiliate links, read more about those here.

👇 Print this Nanaimo Bars Recipe
- ½ cup Butter 1 stick softened
- 1/4 cup sugar
- 5 TBSP Cocoa powder unsweetened
- 1 3/4 cups graham cracker crumbs
- 1 egg beaten
- 1 cup shredded coconut you can use either sweet or unsweet, depending on your taste (I use unsweet)
- 3 TBSP Heavy Whipping Cream
- ½ cup butter 1 stick softened
- 2 TBSP corn starch
- 1 tsp vanilla
- 2 cups powdered sugar
- 4 oz baking chocolate semisweet
- 2 TBSP butter
-
Combine 1/2 cup butter, sugar, and cocoa powder in a pot and on low, melting the butter and ingredients together. Stir occasionally until melted and smooth. Take off stove.
-
While the above is melting, whisk the egg in a separate bowl, then, temper the egg. Do this by mixing tablespoons of the melted butter, sugar, and cocoa mixture, slowly, into the egg. Keep adding tablespoons, then mix, and do this until both mixtures are combined. Set aside.
-
Use a food processor to crush the graham crackers and mix them with the coconut. Add the butter and egg mixture until blended well.
-
Press the mixture into the bottom of an ungreased 8x8 pan, you can use parchment too. Chill in the fridge while working on the second layer!
-
Cream together 1/2 cup butter, heavy cream, cornstarch, and vanilla until light and fluffy. Mix in the powdered sugar until smooth.
-
Spread over the first layer in the pan. Chill while working on third layer.
-
Melt the semisweet chocolate and 2 teaspoons butter together over low heat.
-
Spread over the chilled layer two.
-
Chill to set before cutting into squares.