Making a Paper Mache Volcano
A Fun Science Experiment
While covering Earth during our homeschool program we obviously covered volcanoes. The kids and I agreed that making a paper mache volcano would be fun. Volcanoes are a fun topic for kids, they love watching them erupt!
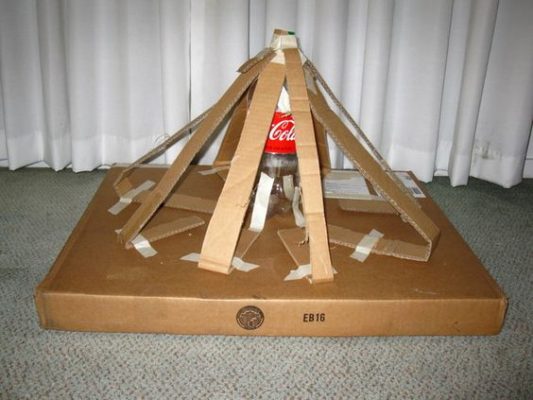
When I started making the bones of the volcano I didn’t really take pictures (oops!) but the picture that I saw and modeled our structure from… is below (I tried to find where the picture originated but could not find a website).
Making a Paper Mache Volcano
What You’ll Need
- A 2-liter bottle or for a smaller volcano a 20 oz. soda bottle
- newspaper
- glue or flour (see below)
- cardboard
- duct or packing tape
 Building the Base
To make the volcano cut a square piece of cardboard for a base, I used the bottom of a pizza box. The bigger the base the less steep your volcano will be.
Next, tape the bottle to the top of the base.
Lastly, cut strips of cardboard, tape them to the base, and then attach them to the top of the plastic bottle. Your structure is done! Now that you have your structure you can move on to the paper mache.
Paper Mache
For paper mache, you will need strips of newspaper… a LOT of newspaper… and you will need to decide on a paper mache recipe from below.
Choosing a Paper Mache Recipe
Your choices in making homemade paper mache are…
- the glue method (using a thick glue like Elmer’s, it’s a 1:1 ratio of glue and water, then mix)
- the baked flour method (1 part flour to 5 parts water, boil about 3 minutes and let cool)
- the unbaked flour method (1:1 ratio of flour and water, then mix)
We used the unbaked flour method for this, but I have used all three. There are great things for all. Some like the baked method because it heats the flour, which can help with mold. The unbaked doesn’t take as much time and doesn’t need to cool. Though some say the unbaked method can mold, we have never had an issue. Both of those are edible, which is nice. Some like the glue method because it’s less mixing and usually schools have glue on hand. Like I said, we did the unbaked for this project, but as my kids got older, our preferred method became with glue.
 How To Do the Mache…
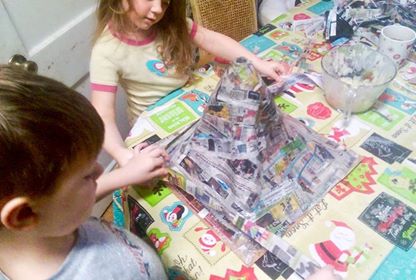
Rip up newspaper, which can be a fun step for kids! Dip your newspaper strips into your mixture and start going around the volcano’s structure, not up and down. This creates a support. Let this support layer dry.
Then, begin to take the strips up and down, working your way around. Let this layer dry.
Keep doing the alternating until you have a filled and covered the volcano, like the picture there. Make sure you also put some of the strips on the base and smooth it out to make it all look connected. Do NOT cover the hole of the bottle if you want to have the volcano erupt later.
Once you have your volcano how you would like it, you have to let it dry and that can take awhile. I don’t remember how long our volcano took because we decided to work on it the same day the following week. Making sure it is dry is important, especially if using either flour method.
Finishing Up
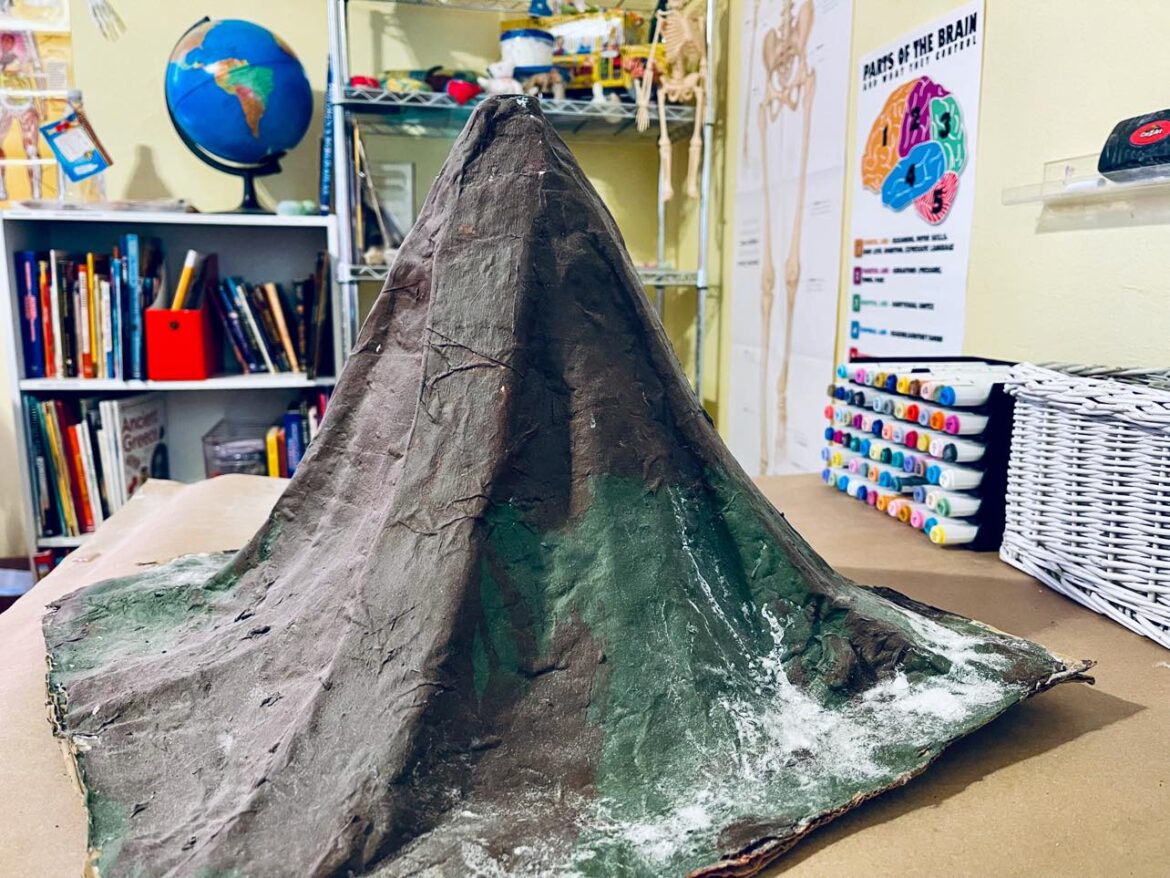
After it has dried, and make sure it is dried thoroughly, you can paint it how you want. If you google paper mache volcanoes, you will see that how they are painted, varies! We did primarily brown with some areas of green.
After the paint has dried you can move onto the fun part… the eruption! For that you will need… baking soda, white vinegar, and a funnel, also for fun you can add some red dye to the mix, though we were out when we did this project.
The Real Fun
To make the volcano erupt simply put about 4 Tbsp of baking soda into the bottle and then pour about a cup of vinegar, give it a few seconds and it will begin to erupt! This doesn’t explode but make sure you do this on a surface that can get wet.
To add to the fun of volcanoes, we got a few books on volcanoes and some igneous rocks for some more hands on learning!
This project was fun and I am so glad we did it, but it did take some time, so if making a volcano is too much or if time is short… grab one of these volcano kits instead!
If you make this paper mache volcano, I would love to hear about it! Comment below or head over to Instagram or Facebook, share your pics, and tag me @bemandfam… I’d love to see them!
Don’t forget to pin this for later and if you like Pinterest, I am there too!
BEM + Fam 🙂 ![]()
![]()
![]()
![]()
![]()
![]()
![]()
![]()
![]()
![]()
![]()
![]()

PS. This post has some affiliate links, read more about those here.