

Strawberry Nanaimo Bars
A Twist on a Canadian Classic
When we first made Nanaimo Bars, it was because we stumbled across them while learning about Canada. A no-bake, three-layer dessert with a rich crumb base and creamy center felt approachable with the kids… and honestly, a little different from what we usually made.
That first batch quickly became a favorite.
Once you understand how Nanaimo Bars are built, it’s easy to see how variations can happen. The structure stays the same, but small flavor changes completely transform the final result.
I wanted to make a pink version for Valentine’s Day and naturally strawberries came to mind. It took me some time to come up with how to transform these into strawberry Nanaimo bars without using strawberry pudding. I ended on freeze dried strawberries for layers 1 and 2… hoping it would work.
I also debated on whether to keep the traditional dark chocolate topping or switch to white chocolate. Dark chocolate is classic, and white chocolate isn’t technically chocolate at all, but for Valentine’s Day, I decided to go with white chocolate for a softer look and flavor.
A Quick Note on the Original
Classic Nanaimo Bars are named after Nanaimo, British Columbia (pronounced nuh-n-eye-mo), a city on Vancouver Island. They traditionally have three layers:
- a coconut crumb base
- a buttery vanilla custard-style middle
- a smooth dark chocolate topping
This strawberry version keeps the same layers, just with a few simple swaps.
What You’ll Need
Ingredients
- Butter
- Sugar
- Graham crackers
- Freeze-dried strawberries
- Egg
- Shredded coconut
- Heavy cream
- Vanilla
- Powdered sugar
- Cornstarch
- White chocolate
Supplies
- 8×8 pan
- Mixing bowls
- Spatula
- Parchment paper (optional, but helpful)
As with the classic version… yes, they’re sweet and rich. These are meant to be enjoyed in small pieces.
How to Make Strawberry Nanaimo Bars
Layer 1: Strawberry Coconut Crumb Base

- Melt the butter and sugar together. Temper the egg with the mixture. Mix in graham cracker crumbs, shredded coconut, and 7 tbsps of finely crushed freeze-dried strawberries.
- Press the mixture firmly into an 8×8 pan and place it in the refrigerator to chill. You can line the pan with parchment paper if you’d like easier removal later… I do this now, though when I first made them, I just used the pan. I do find it easier to remove and cut.
Layer 2: Strawberry Vanilla Butter Icing

- Cream butter with heavy cream, cornstarch, and vanilla until smooth. Gradually mix in powdered sugar.
- Add the rest of the strawberry powder and mix until the icing is lightly pink and evenly flavored.
- Spread over the chilled base and return the pan to the refrigerator.
Layer 3: White Chocolate Topping

- Gently melt white chocolate with butter using a double boiler or very low heat.
- Spread evenly over the chilled middle layer.
- Refrigerate until fully set before slicing.
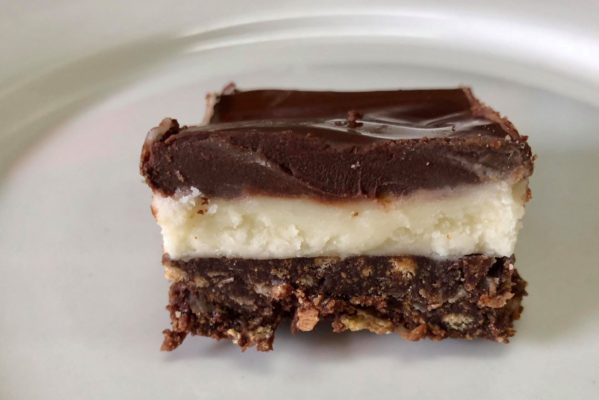
⭐ White chocolate can be harder to melt than regular chocolate. Here you can see the remains of a few chips in the layer. When the layer chilled those were not visible. For white chocolate, I prefer taking it off the heat early verses letting it melt too much… which sounds a bit crazy but white chocolate can turn into the consistency of mashed potatoes if overheated.
Helpful Notes & Variations
- Freeze-dried strawberries add flavor and natural color without extra moisture or dyes.
- Use real butter, not margarine, the texture matters here.
- If you’re outside the U.S. or can’t find graham crackers, digestive biscuits work well as a substitute.
- Chilling between layers makes a big difference, especially for clean slices.
- Custard powder is traditionally used, but not always available in the U.S. and cornstarch is a traditional substitute. I personally use organic cornstarch, and for those that aren’t sure about cornstarch, while it can spike blood sugar, it is fine to use in a dessert that already will spike sugar.
- These bars are rich, an 8×8 pan can easily make 16, or even 32 bite-size pieces.
- When cutting, I recommend warming the knife under hot water, wiping water off, then cutting. Do this between each cut for the cleanest cuts.
Flavor Variations
Once you’ve made the base recipe, small changes open the door to endless variations:
- Mint
- Peanut butter
- Mocha
- Original
You don’t need dozens of separate recipes, just one solid foundation that you can adapt!
A Few Helpful Links (If You Want to Go Further)
If you’d like to pair this recipe with a little learning, or make future batches easier, here are a few things we’ve found helpful over the years.
- Canada Learning Pack
We originally made Nanaimo Bars while learning about Canada. This pack keeps things simple and flexible, making it easy to explore geography and culture alongside everyday activities like cooking. I made it for my kids and use it with my students… I hope you enjoy it! - Freeze-Dried Strawberries
These add real strawberry flavor and natural color without adding moisture. They’re what makes this version work without artificial dyes or flavors. I had to grind up my strawberries in a coffee grinder and the biggest bag I could find was 2 ounces, but you can use this link to buy the strawberries already ground. It’s called strawberry powder and is much cheaper this way! - 8×8 Baking Pan
This size gives the best layer thickness for Nanaimo Bars and makes slicing cleaner and more consistent. Double to do a 9×13, it won’t be exact, but it will work. - White Baking Chocolate
White chocolate pairs well with strawberry and creates a softer, truffle-like top layer compared to dark chocolate.
Enjoy This Twist on a Classic
These Strawberry Nanaimo Bars are delicious. The freeze-dried strawberries give them a real strawberry flavor… both sweet and slightly tangy. They’re a great treat for Strawberry Day (February 27th) and perfect for Valentine’s Day.
While I used white chocolate for the top layer, you could absolutely use dark chocolate instead. It would lean more toward a chocolate-covered strawberry flavor, and honestly, that sounds delicious too.
You’ll also find this recipe in the February chapter of our family planner, alongside other gentle seasonal ideas meant to slow the month down and make time for small celebrations.
If you try these Strawberry Nanaimo bars, or experiment with your own flavor variation, I’d love to hear about it. You can comment below or tag @bemandfam on Instagram or Facebook.
BEM & Fam 🙂
👉 Save This for Later

PS. This post has some affiliate links, read more about those here.

👇 Print this Strawberry Nanaimo Bars Recipe

Sweet strawberry take on a Canadian classic dessert.
- 1/2 cup butter, 1 stick softened
- ¼ cup sugar
- 5 tbsp strawberry powder pre-ground or ground from freeze dried strawberries
- 1¾ cups graham crackers, crumbed I used about 1 pack and 5 crackers from second, but check to make sure.
- 1 egg to be tempered
- 1 cup shredded coconut sweetened or unsweetened, I use unsweetened
- ½ cup butter, 1 stick softened
- 4 tbsp heavy cream
- 2 tbsp corn starch
- 1 tsp. vanilla
- 3-4 tbsp strawberry powder same as layer one
- 2 cups powdered sugar
- 6 oz white chocolate
- 4 tbsp butter
-
In a saucepan over low heat, combine the butter and sugar, stirring gently until melted and smooth. Remove from heat.
-
In a separate bowl, whisk the egg. Slowly temper the egg by adding a tablespoon at a time of the warm butter mixture into the egg, whisking between each addition. Continue until fully combined, then set aside.
-
In a large bowl, mix the graham cracker crumbs, shredded coconut, and strawberry powder. Then, add the butter-egg mixture and mix until fully combined.
-
Press the mixture firmly into the bottom of an 8×8 pan (parchment optional but helpful). Chill in the refrigerator while preparing the second layer.
-
Cream together the butter, heavy cream, cornstarch, and vanilla until smooth and fluffy. Gradually mix in the powdered sugar and strawberry powder until fully incorporated.
-
Spread evenly over the chilled base layer. Return the pan to the refrigerator while preparing the topping.
-
Melt the chocolate and butter together over very low heat (or using a double boiler), stirring gently until smooth.
-
Spread evenly over the chilled second layer. Refrigerate until fully set before cutting into squares.
-
Chocolate choice:
Semisweet chocolate keeps this closer to the classic Nanaimo Bar. White chocolate creates a softer, strawberries and cream finish... that is great for Valentine's Day, Strawberry Day (Feb 27th), or just for something different. -
White chocolate melts differently than other chocolates, remove from heat early and stir gently to avoid overheating.
-
These bars are rich; an 8×8 pan easily makes 16–32 small squares.
-
For clean cuts, warm a knife under hot water, wipe dry, and cut... repeating between slices.